Toyota Tacoma (2005–2015) Owners Manual: Refueling
Opening the fuel tank cap
Perform the following steps to open the fuel tank cap.
■ Before refueling the vehicle
Turn the engine switch off and ensure that all the doors and windows are closed.
■ Opening the fuel tank cap
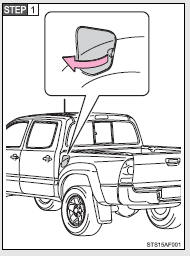
Open the fuel filler door.
Turn the fuel tank cap slowly to open.
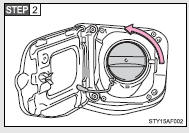
Closing the fuel tank cap
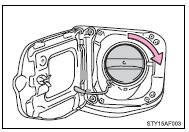
When replacing the fuel tank cap, turn it until a clicking sound is heard.
After releasing your hand, the cap will turn slightly to the opposite direction.
■Fuel types
Use unleaded gasoline. (Octane Rating 87 [Research Octane Number 91] or higher)
■Fuel tank capacity
Approximately 21.1 gal. (80.0 L, 17.6 Imp.gal.)
CAUTION
■Refueling the vehicle
Observe the following precautions while refueling the vehicle.
Failure to do so, may result in death or serious injury.
●Touch the vehicle or some other metal surface to discharge any static electricity.
Sparks resulting from discharging static electricity may cause the fuel vapors to ignite.
●Always hold the grips on the fuel tank cap and turn it slowly to remove it.
A whooshing sound may be heard when the fuel tank cap is loosened.
Wait until the sound cannot be heard before fully removing the cap.
In hot weather, pressurized fuel may spray out of the filler neck and cause injury.
●Do not allow anyone that has not discharged static electricity from their bodies to come close to an open fuel tank.
CAUTION
■Refueling the vehicle
●Do not inhale vaporized fuel.
Fuel contains substances that are harmful if inhaled.
●Do not smoke while refueling the vehicle.
Doing so may cause the fuel to ignite and cause a fire.
●Do not return to the vehicle or touch any person or object that is statically charged.
This may cause static electricity to build up, resulting in a possible engine hazard.
■When replacing the fuel tank cap
Do not use anything but a genuine Toyota fuel tank cap designed for your vehicle. Doing so may cause a fire or other incident which may result in death or serious injury.
NOTICE
■Refueling
Do not spill fuel during refueling.
Doing so may damage the vehicle, such as causing the exhaust systems to operate abnormally or damaging fuel system components or the vehicle’s painted surface.
■To prevent damage to the fuel filler door
Do not apply excessive force.
 Back window (vehicles with sliding type)
The back window can be opened and closed using the lock release lever.
Open/close
Push the lock release lever and slide the back window.
■Closing the back window
Make sure that the back wi ...
 Theft deterrent system
Engine immobilizer system
The vehicle’s keys have built-in transponder chips that prevent the engine from
starting if the key has not been previously registered in the vehicle’s on-board
comp ...
Other materials:
Brake Booster Pump Motor on Time Abnormally Long (C1252)
DESCRIPTION
The motor relay (semiconductor relay) is built into the master cylinder solenoid
and drives the pump motor based on a signal from the skid control ECU (master cylinder
solenoid).
DTC No.
DTC Detecting Condition
Trouble Areas
C1252
...
Driving the vehicle
The following procedures should be observed to ensure safe driving.
■ Starting the engine
■ Driving
Automatic transmission
With the brake pedal depressed,
shift the shift lever to D.
Release the parking brake.
Gradually release the brake pedal
and gently depress the acceler ...
Sliding Roof ECU Communication Stop (B1273)
DESCRIPTION
This DTC is stored when LIN communication between the sliding roof ECU (sliding
roof drive gear sub-assembly) and main body ECU (multiplex network body ECU) stops
for 10 seconds or more.
DTC No.
DTC Detection Condition
Trouble Area
...
