REMOVAL
CAUTION / NOTICE / HINT
CAUTION:
Some of these service operations affect the SRS airbag system. Read the precautionary notices concerning the SRS airbag system before servicing.
Click here .gif)
PROCEDURE
1. PRECAUTION
NOTICE:
After turning the ignition switch off, waiting time may be required before disconnecting the cable from the negative (-) battery terminal. Therefore, make sure to read the disconnecting the cable from the negative (-) battery terminal notices before proceeding with work.
Click here
2. DISCONNECT CABLE FROM NEGATIVE BATTERY TERMINAL
CAUTION:
Wait at least 90 seconds after disconnecting the cable from the negative (-) battery terminal to disable the SRS system.
NOTICE:
When disconnecting the cable, some systems need to be initialized after the cable is reconnected.
Click here
3. REMOVE SEAT TRACK COVER
(a) for Driver Side:
Click here
(b) for Front Passenger Side:
Click here
4. REMOVE FRONT SEAT ASSEMBLY
(a) for Driver Side:
Click here
(b) for Front Passenger Side:
Click here
5. REMOVE FRONT SEAT INNER BELT ASSEMBLY
(a) for Driver Side:
|
(1) Disengage the 3 clamps. |
|
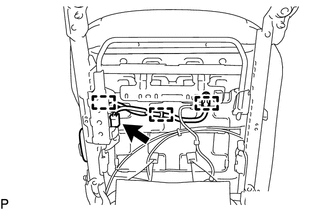
(2) Disconnect the seat position sensor connector.
|
(3) Remove the nut and front seat inner belt assembly. |
|
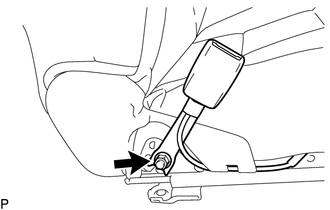
(4) Remove the front seat belt anchor plate.
(b) for Front Passenger Side:
|
(1) Disconnect the connector. |
|
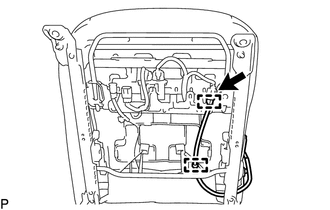
(2) Disengage the 2 clamps.
|
(3) Remove the nut and front seat inner belt assembly. |
|
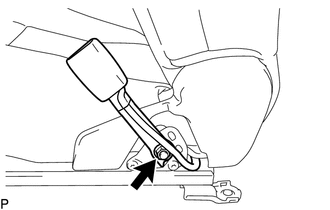
(4) Remove the front seat belt anchor plate.