
Toyota Tacoma (2015-2018) Service Manual: Parts Location
PARTS LOCATION
ILLUSTRATION
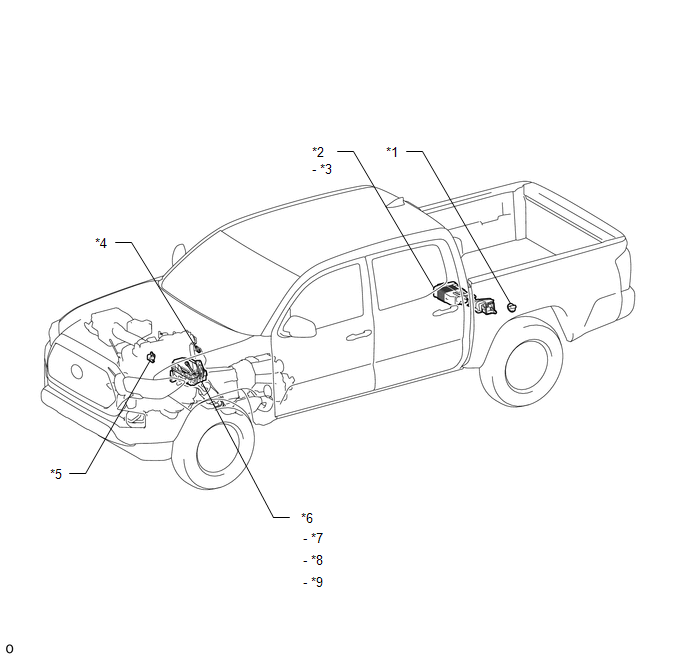
|
*1 |
FUEL TANK CAP ASSEMBLY |
*2 |
CHARCOAL CANISTER ASSEMBLY |
|
*3 |
CHARCOAL CANISTER LEAK DETECTION PUMP SUB-ASSEMBLY |
*4 |
PCV VALVE |
|
*5 |
PURGE VSV |
*6 |
ENGINE ROOM RELAY BLOCK |
|
*7 |
EFI-MAIN NO. 1 RELAY |
*8 |
EFI-MAIN FUSE |
|
*9 |
EFI NO. 3 FUSE |
- |
- |
ILLUSTRATION
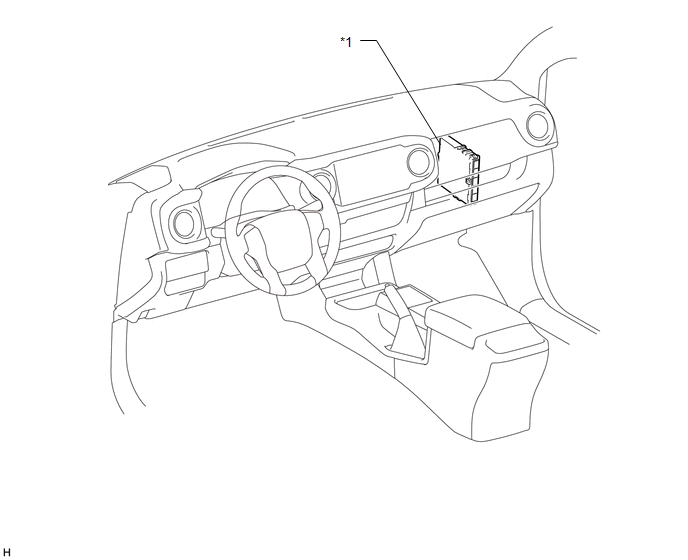
|
*1 |
ECM |
- |
- |
 On-vehicle Inspection
ON-VEHICLE INSPECTION
PROCEDURE
1. INSPECT FUEL CUT OPERATION
(a) Start the engine and warm it up.
(b) Increase the engine speed to at least 3500 rpm.
(c) Use a sound scope to check for fuel inje ...
 System Diagram
SYSTEM DIAGRAM
...
Other materials:
Installation
INSTALLATION
PROCEDURE
1. INSTALL NO. 1 STEREO JACK ADAPTER ASSEMBLY
(a) Engage the 2 claws to install the No. 1 stereo jack adapter assembly.
2. INSTALL INSTRUMENT PANEL LOWER CENTER FINISH PANEL
(See page )
3. INSTALL NO. 2 INSTRUMENT PANEL GARNISH SUB-ASSEMBLY
(See page )
4. INSTALL F ...
Adjustment
ADJUSTMENT
PROCEDURE
1. ADJUST PARK/NEUTRAL POSITION SWITCH
(a) While pushing the shift lock release button, move the shift lever to N.
(b) Remove the bolt of the park/neutral position switch.
(c) Clean the bolt and bolt hole.
(d) Apply adhesive to 2 or 3 threads on the end of the bolt.
Adhes ...
Reassembly
REASSEMBLY
CAUTION / NOTICE / HINT
HINT:
Use the same procedure for both the LH and RH sides.
The procedure described below is for the LH side.
PROCEDURE
1. INSTALL FOG LIGHT BULB
(a) Turn the fog light bulb in the direction indicated by the arrow in
the illust ...
