Components
COMPONENTS
ILLUSTRATION
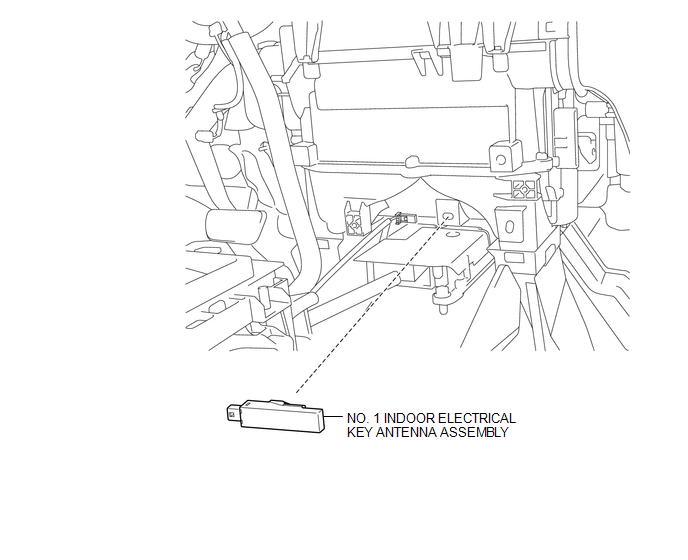
Installation
INSTALLATION
PROCEDURE
1. INSTALL NO. 1 INDOOR ELECTRICAL KEY ANTENNA ASSEMBLY
(a) Engage the clamp to install the No. 1 indoor electrical key antenna assembly.
(b) Connect the connector.
2. INSTALL FRONT CONSOLE BOX
(See page
)
Removal
REMOVAL
PROCEDURE
1. REMOVE FRONT CONSOLE BOX
(See page
)
2. REMOVE NO. 1 INDOOR ELECTRICAL KEY ANTENNA ASSEMBLY
|
(a) Disconnect the connector. |
|
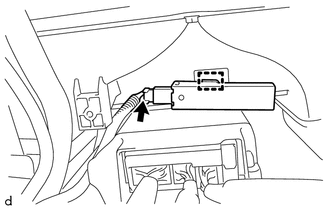
(b) Using a clip remover, disengage the clamp to remove the No. 1 indoor electrical key antenna assembly.
Door Control Transmitter(w/ Smart Key System)
Electrical Key Oscillator(for Rear Floor)Chassis
General Maintenance
GENERAL MAINTENANCE
PROCEDURE
1. INSPECT STEERING LINKAGE
(a) Check the steering wheel free play (See page
).
(b) Check the steering linkage for looseness or damage.
(1) Check that the tie rod ends do not have excessive play.
(2) Check that the dust seals and boots are ...
Installation
INSTALLATION
PROCEDURE
1. INSTALL AUTO HIGH BEAM SWITCH
(a) Attach the 2 claws to install the auto high beam switch to the instrument
panel lower finish panel sub-assembly.
2. INSTALL INSTRUMENT PANEL LOWER FINISH PANEL SUB-ASSEMBLY
Click here
3. CONNECT HOOD LOCK CONTROL LEVER SUB-ASSEMBL ...
Installation
INSTALLATION
CAUTION / NOTICE / HINT
HINT:
Use the same procedure for both the RH and LH sides.
The procedure described below is for the LH side.
PROCEDURE
1. INSTALL FRONT SHOULDER BELT ANCHOR ADJUSTER ASSEMBLY
(a) As shown in the illustration, engage the 2 guides ...