Toyota Tacoma (2015-2018) Service Manual: Components
COMPONENTS
ILLUSTRATION
|
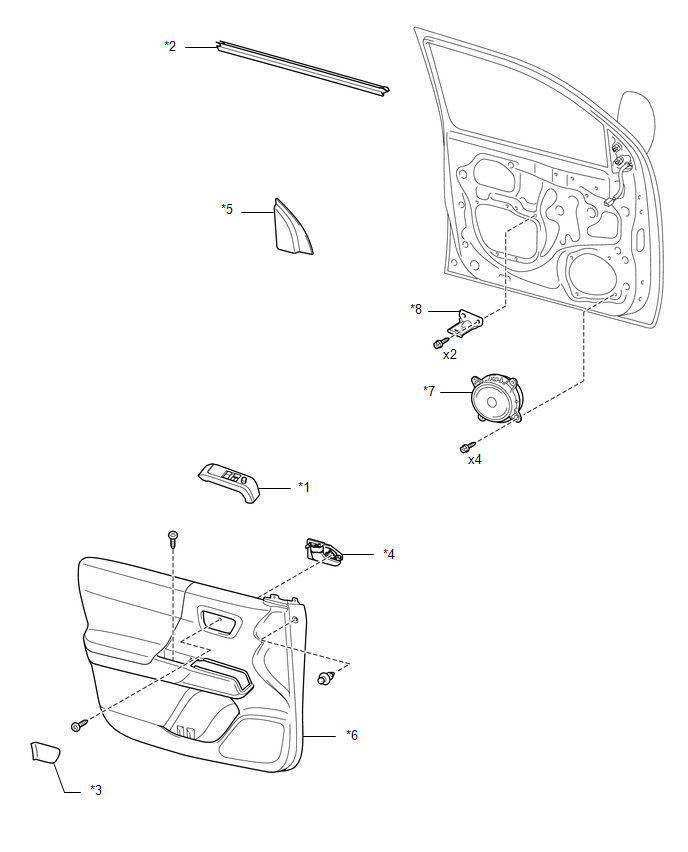
*1 |
FRONT ARMREST BASE UPPER PANEL SUB-ASSEMBLY |
*2 |
FRONT DOOR GLASS INNER WEATHERSTRIP |
|
*3 |
FRONT DOOR INSIDE HANDLE BEZEL PLUG |
*4 |
FRONT DOOR INSIDE HANDLE SUB-ASSEMBLY |
|
*5 |
FRONT DOOR LOWER FRAME BRACKET GARNISH |
*6 |
FRONT DOOR TRIM BOARD SUB-ASSEMBLY |
|
*7 |
FRONT NO. 1 SPEAKER ASSEMBLY |
*8 |
NO. 1 DOOR TRIM BRACKET |
ILLUSTRATION
|
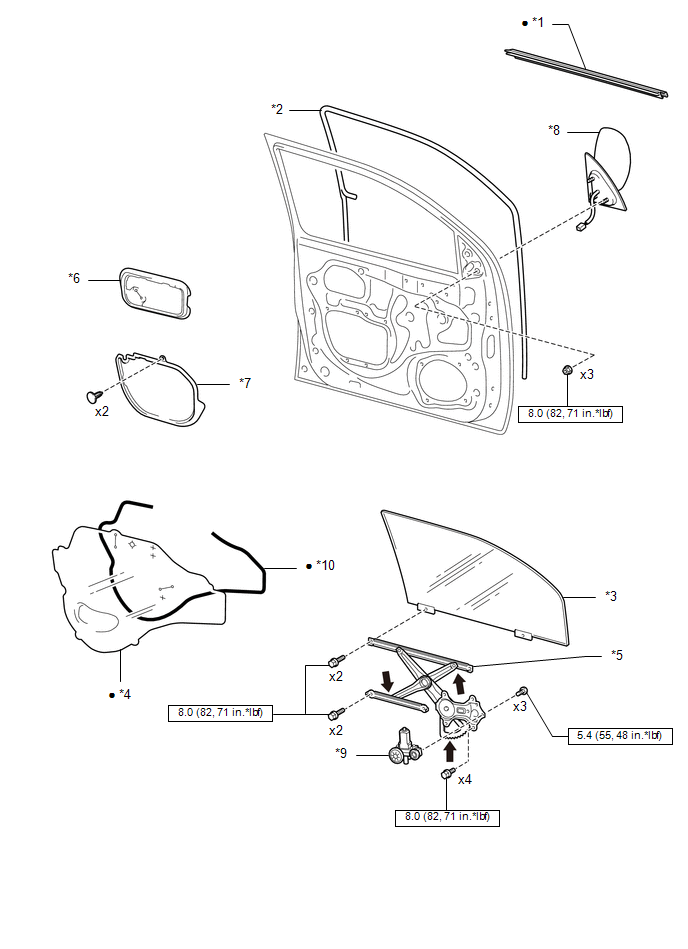
*1 |
FRONT DOOR GLASS OUTER WEATHERSTRIP ASSEMBLY |
*2 |
FRONT DOOR GLASS RUN |
|
*3 |
FRONT DOOR GLASS SUB-ASSEMBLY |
*4 |
FRONT DOOR SERVICE HOLE COVER |
|
*5 |
FRONT DOOR WINDOW REGULATOR SUB-ASSEMBLY |
*6 |
NO. 1 FRONT DOOR SERVICE HOLE COVER |
|
*7 |
NO. 2 FRONT DOOR SERVICE HOLE COVER |
*8 |
OUTER REAR VIEW MIRROR ASSEMBLY |
|
*9 |
POWER WINDOW REGULATOR MOTOR ASSEMBLY |
*10 |
BUTYL TAPE |
.png) |
N*m (kgf*cm, ft.*lbf): Specified torque |
â—Ź |
Non-reusable part |
.png) |
MP grease |
- |
- |
ILLUSTRATION
|
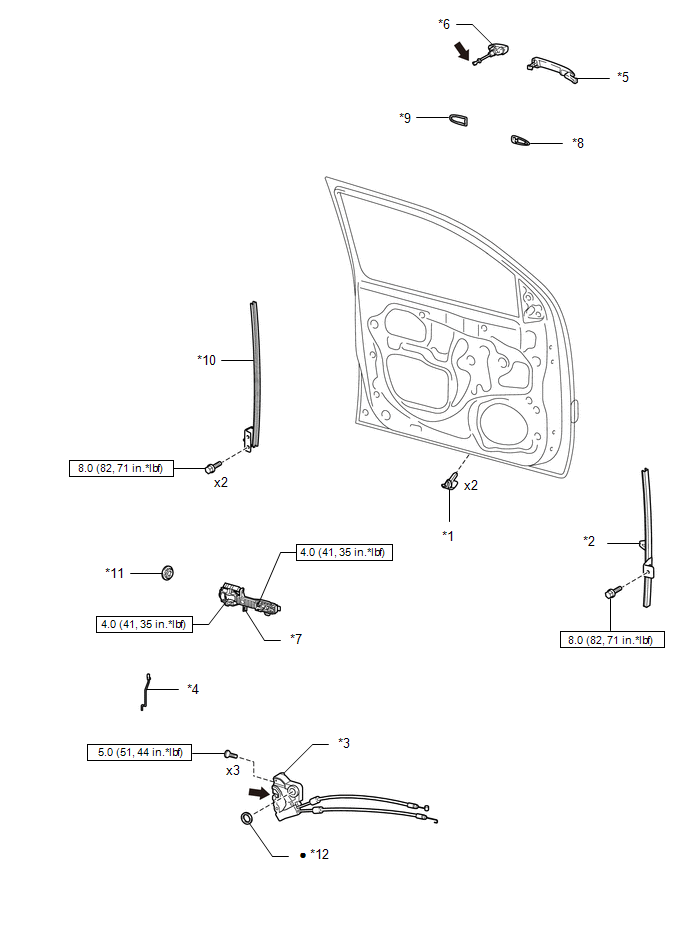
*1 |
FRONT DOOR DUST PROOF SEAL |
*2 |
FRONT DOOR FRONT LOWER FRAME SUB-ASSEMBLY |
|
*3 |
FRONT DOOR LOCK ASSEMBLY |
*4 |
FRONT DOOR LOCK OPEN ROD |
|
*5 |
FRONT DOOR OUTSIDE HANDLE ASSEMBLY |
*6 |
FRONT DOOR OUTSIDE HANDLE COVER |
|
*7 |
FRONT DOOR OUTSIDE HANDLE FRAME SUB-ASSEMBLY |
*8 |
FRONT DOOR OUTSIDE HANDLE FRONT PAD |
|
*9 |
FRONT DOOR OUTSIDE HANDLE REAR PAD |
*10 |
FRONT DOOR REAR LOWER FRAME SUB-ASSEMBLY |
|
*11 |
HOLE PLATE |
*12 |
DOOR LOCK WIRING HARNESS SEAL |
|
|
N*m (kgf*cm, ft.*lbf): Specified torque |
â—Ź |
Non-reusable part |
|
|
MP grease |
- |
- |
ILLUSTRATION
|
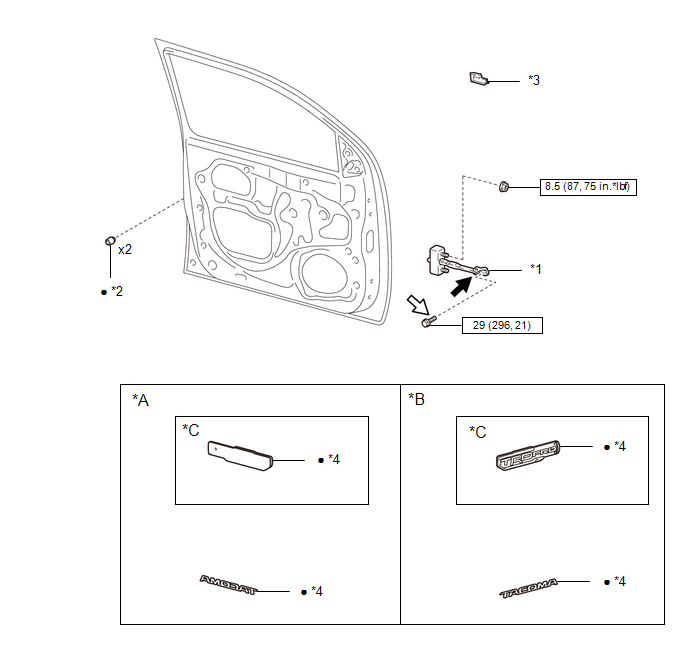
*A |
for LH Side |
*B |
for RH Side |
|
*C |
for LED Fog Light |
- |
- |
|
*1 |
FRONT DOOR CHECK ASSEMBLY |
*2 |
FRONT DOOR PANEL CUSHION |
|
*3 |
FRONT DOOR PANEL PROTECTOR |
*4 |
FRONT NO. 1 DOOR NAME PLATE |
|
|
N*m (kgf*cm, ft.*lbf) : Specified torque |
â—Ź |
Non-reusable part |
|
|
MP grease |
.png) |
Toyota Genuine Adhesive 1324, Three Bond 1324 or equivalent |
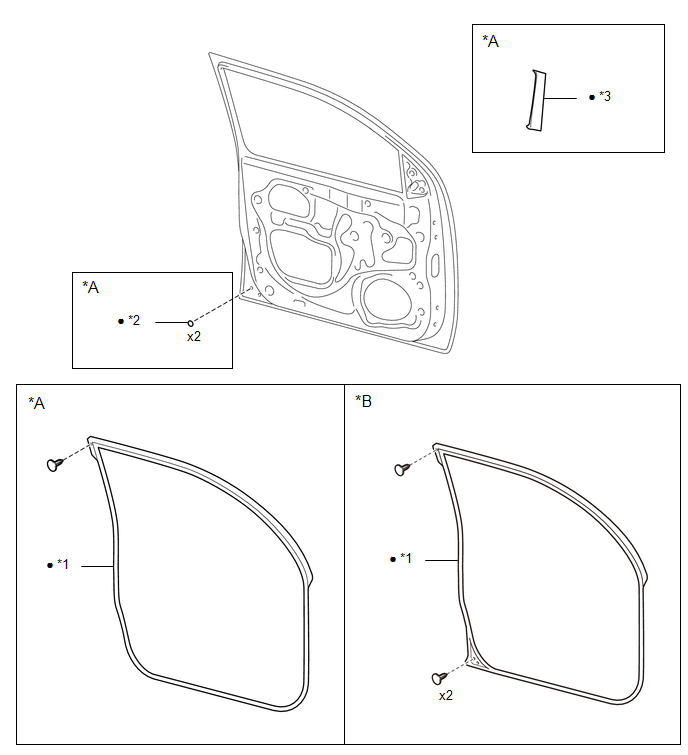
ILLUSTRATION
|
*A |
for Double Cab |
*B |
for Access Cab |
|
*1 |
FRONT DOOR WEATHERSTRIP |
*2 |
HOLE PLATE |
|
*3 |
NO. 1 BLACK OUT TAPE |
- |
- |
|
â—Ź |
Non-reusable part |
- |
- |
 Adjustment
ADJUSTMENT
CAUTION / NOTICE / HINT
HINT:
Use the same procedures for both the LH and RH sides.
The procedure described below is for the LH side.
Centering bolts are used to mount th ...
 Hood
Hood
...
Other materials:
Dtc Check / Clear
DTC CHECK / CLEAR
1. CHECK FOR DTC
HINT:
When using the Techstream with the engine switch off, connect the Techstream
to the DLC3 and turn a courtesy light switch on and off at intervals of 1.5 seconds
or less until communication between the Techstream and the vehicle begins. Then
select th ...
Calibration
CALIBRATION
1. DESCRIPTION
(a) After replacing any VSC related components or performing wheel alignment
adjustment, clear and read the sensor calibration data.
Refer to the table below and then perform the necessary operation according to
the part to be replaced in order to perform calibratio ...
Removal
REMOVAL
PROCEDURE
1. REMOVE NO. 2 ENGINE UNDER COVER SUB-ASSEMBLY (w/ Off Road Package)
2. REMOVE NO. 1 ENGINE UNDER COVER SUB-ASSEMBLY
3. DRAIN ENGINE COOLANT
4. REMOVE RADIATOR GRILLE
(See page )
5. REMOVE V-BANK COVER SUB-ASSEMBLY
6. REMOVE RADIATOR SUPPORT TO FRAME SEAL
7. R ...
