Components
COMPONENTS
ILLUSTRATION
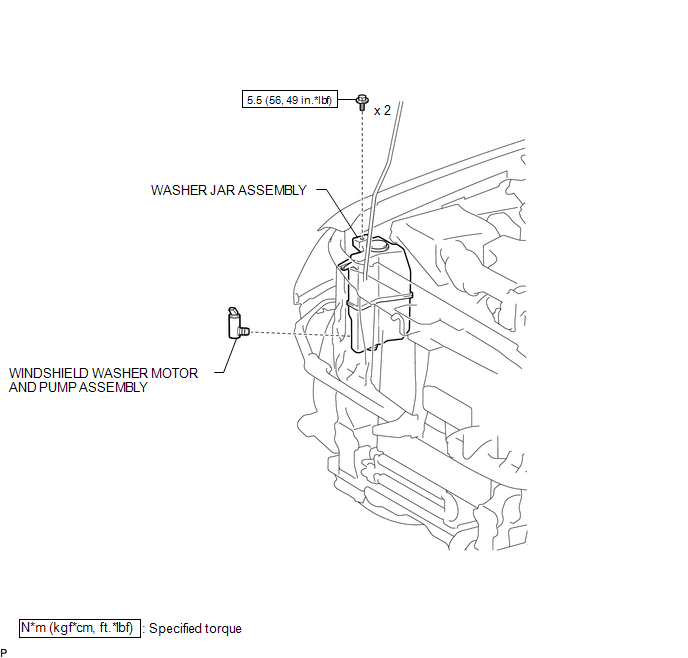
On-vehicle Inspection
ON-VEHICLE INSPECTION
PROCEDURE
1. INSPECT WINDSHIELD WASHER MOTOR AND PUMP ASSEMBLY
HINT:
This check should be performed with the windshield washer motor and pump assembly installed to the windshield washer jar assembly.
|
(a) With the windshield washer motor and pump assembly installed to the washer jar, pour windshield washer fluid into the washer jar. Text in Illustration
|
|
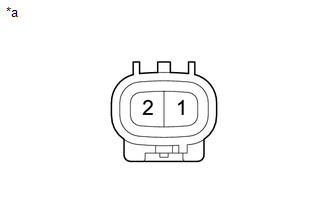
(b) Check that the windshield washer fluid is pumped when battery voltage is applied to the terminals.
:
|
Condition |
Specified Condition |
|---|---|
|
Battery positive (+) → Terminal 1 Battery negative (-) → Terminal 2 |
Washer fluid is pumped |
If the result is not as specified, replace the windshield washer motor and pump assembly.
Removal
REMOVAL
PROCEDURE
1. REMOVE HEADLIGHT ASSEMBLY RH
HINT:
Use the same procedure as for the LH side (See page
.gif) ).
).
2. SEPARATE WASHER JAR ASSEMBLY
|
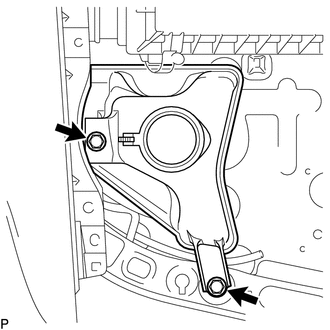
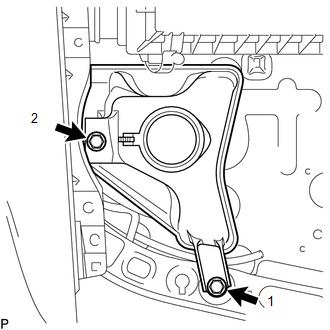
(a) Remove the 2 bolts to separate the washer jar assembly from the vehicle body. |
|
3. DRAIN WINDSHIELD WASHER FLUID
|
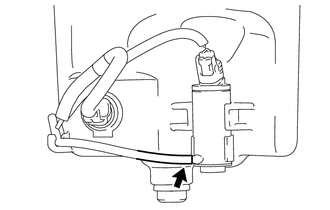
(a) Disconnect the washer hose from the windshield washer motor and pump assembly, and drain the windshield washer fluid. HINT: Use a container to collect the washer fluid. |
|
4. REMOVE WINDSHIELD WASHER MOTOR AND PUMP ASSEMBLY
|
(a) Disconnect the connector. |
|
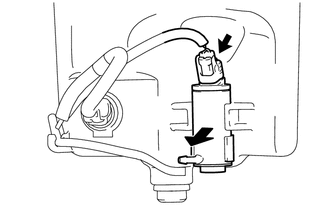
(b) Remove the windshield washer motor and pump assembly as shown in the illustration.
Installation
INSTALLATION
PROCEDURE
1. INSTALL WINDSHIELD WASHER MOTOR AND PUMP ASSEMBLY
|
(a) Install the windshield washer motor and pump assembly. |
|
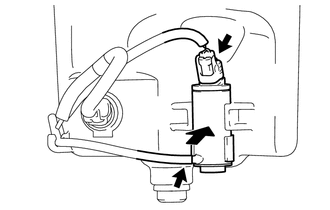
(b) Connect the washer hose.
(c) Connect the connector.
2. INSTALL WASHER JAR ASSEMBLY
|
(a) Install the windshield washer jar assembly with the 2 bolts in the order shown in the illustration. Torque: 5.5 N·m {56 kgf·cm, 49 in·lbf} |
|
3. ADD WASHER FLUID
(a) Add washer fluid to the washer jar assembly.
4. INSTALL HEADLIGHT ASSEMBLY RH
HINT:
Use the same procedure as for the LH side. (See page
.gif) )
)