Components
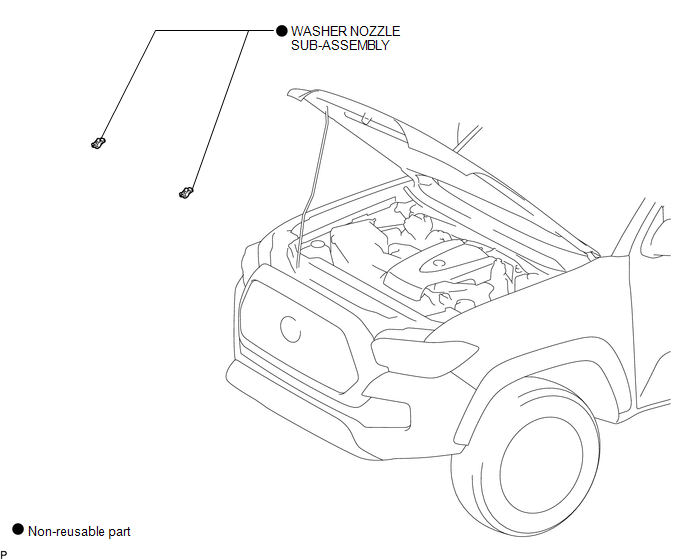
COMPONENTS
ILLUSTRATION
On-vehicle Inspection
ON-VEHICLE INSPECTION
PROCEDURE
1. INSPECT WASHER NOZZLE SUB-ASSEMBLY
(a) Operate the washer nozzle sub-assembly and check the position that the washer fluid hits the windshield.
Standard:
Washer fluid hits the windshield glass in the areas shown in the illustration.
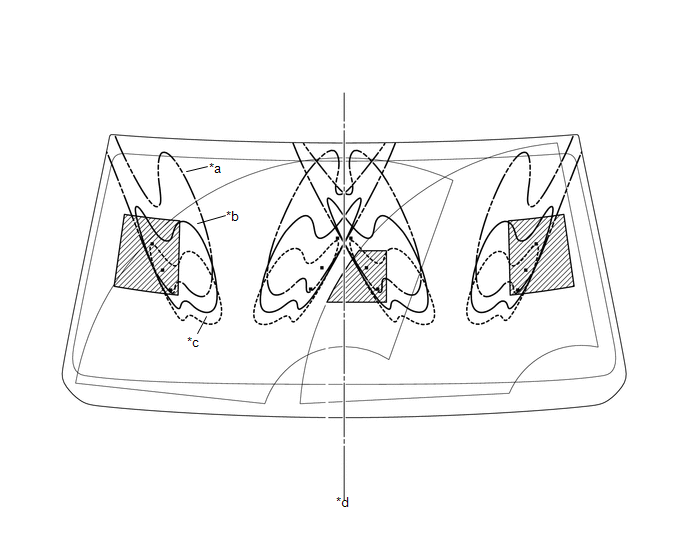 Text in Illustration
|
*a |
Upper Limit |
*b |
Standard |
|
*c |
Lower Limit |
*d |
Vehicle center line |
.png) |
Reference |
- |
- |
HINT:
If the result is not as specified, replace the washer nozzle sub-assembly.
Adjustment
ADJUSTMENT
PROCEDURE
1. REMOVE WASHER NOZZLE SUB-ASSEMBLY
.gif)
2. ADJUST WASHER NOZZLE SUB-ASSEMBLY
(a) Select a washer nozzle so that the contact area is within the standard. Replace the washer nozzle with the selected one.
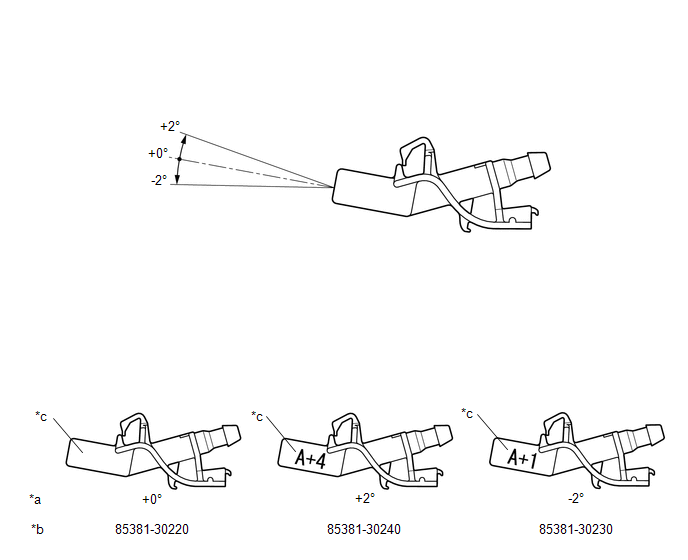 Text in Illustration
|
*a |
Washer Fluid Spray Angle |
*b |
Part Number |
|
*c |
Identification Mark |
- |
- |
3. INSTALL WASHER NOZZLE SUB-ASSEMBLY
Installation
INSTALLATION
PROCEDURE
1. INSTALL WASHER NOZZLE SUB-ASSEMBLY
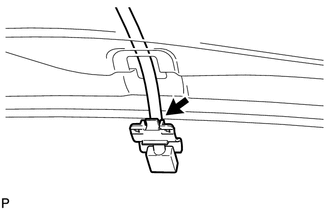
(a) Connect a new washer nozzle sub-assembly to the washer hose.
|
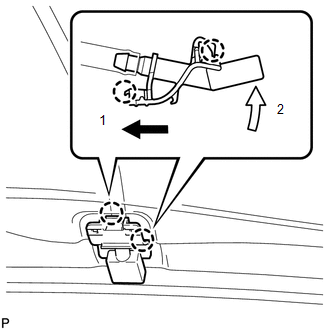
(b) Engage the 2 claws to install the washer nozzle sub-assembly as shown in the illustration. |
|
2. INSPECT WASHER NOZZLE SUB-ASSEMBLY
.gif)
3. ADJUST WASHER NOZZLE SUB-ASSEMBLY
Removal
REMOVAL
PROCEDURE
1. REMOVE WASHER NOZZLE SUB-ASSEMBLY
HINT:
Use the same procedure for both sides.
|
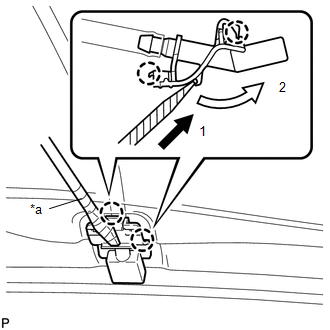
(a) Using a screwdriver with its tip wrapped in protective tape, disengage the 2 claws to separate the washer nozzle sub-assembly as shown in the illustration. Text in Illustration
NOTICE: Do not damage the windshield glass. |
|
|
(b) Remove the washer nozzle sub-assembly from the washer hose. NOTICE: Washer nozzle sub-assembly cannot be reused. |
|