Components
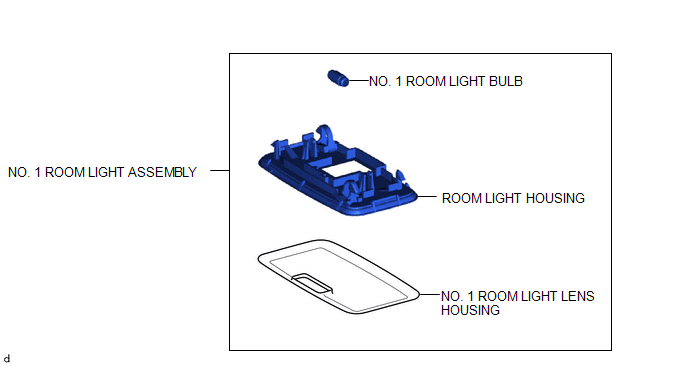
COMPONENTS
ILLUSTRATION
Removal
REMOVAL
PROCEDURE
1. REMOVE NO. 1 ROOM LIGHT ASSEMBLY
|
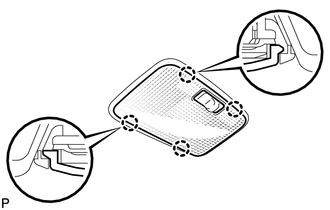
(a) Using a screwdriver with its tip wrapped in protective tape, disengage the 4 claws to remove the No. 1 room light lens. Text in Illustration
|
|
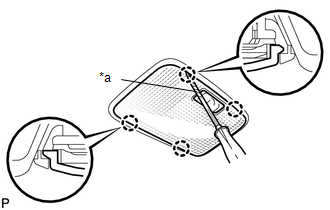
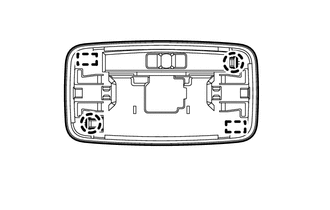
(b) Using a screwdriver with its tip wrapped in protective tape, disengage the 2 claws and 2 guides to separate the No. 1 room light housing as shown in the illustration.
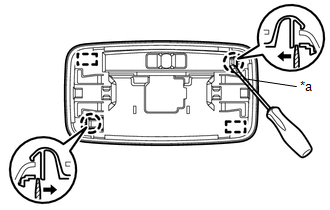 Text in Illustration
|
*a |
Protective Tape |
.png) |
Push |
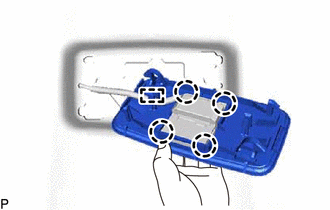
(c) Disengage the guide to separate the wire harness.
|
(d) Disengage the 4 claws to separate the No. 1 room light housing from the room light switch base. |
|
2. REMOVE NO. 1 ROOM LIGHT BULB
(a) Remove the No. 1 room light bulb.
Installation
INSTALLATION
PROCEDURE
1. INSTALL NO. 1 ROOM LIGHT BULB
(a) Install the No. 1 room light bulb.
2. INSTALL NO. 1 ROOM LIGHT ASSEMBLY
(a) Engage the 4 claws to install the No. 1 room light housing to the room light switch base.
(b) Engage the guide to install the wire harness.
|
(c) Engage the 2 guides and 2 claws to install the No. 1 room light housing. |
|
|
(d) Engage the 4 claws to install the No. 1 room light lens. |
|