Toyota Tacoma (2015-2018) Service Manual: Registration
REGISTRATION
PROCEDURE
1. REGISTER TRANSMITTER CODE
HINT:
- The vehicle's garage door opener records transmitter codes for systems such as garage doors, gates, entry gates, door locks, home lighting systems, security systems or other transmitter code based systems.
- The garage door opener is built into the inner rear view mirror assembly. If replacing the inner rear view mirror assembly, transmitter codes for any systems previously registered in the garage door opener must be reregistered.
(a) Reregister systems in the garage door opener registration mode.
CAUTION:
Do not perform transmitter code registration for a system if people or objects are near the system. When registering transmitter codes for a system, injury or damage can occur because the system may open, close, unlock or otherwise operate.
NOTICE:
- Before transmitter code registration, confirm that all the electrical systems (headlight, blower motor, rear defogger, etc.) are turned off and no key is in the vehicle.
- The garage door opener cannot be used with systems that: 1) were manufactured before April 1, 1982; or 2) do not meet Federal Standards (for example, garage doors without a jam protection function).
HINT:
- 3 transmitter codes can be registered with the garage door opener, one transmitter code for each of the 3 garage door opener switches.
- Disconnecting the battery will not erase the transmitter codes registered with the garage door opener.
- An attempt to overwrite a previously registered transmitter code with a new system's transmitter code may fail. In this situation, the previously registered transmitter code will not be erased.
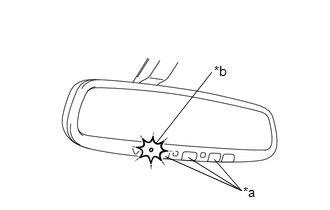
(1) Select a garage door opener switch for transmitter code registration.
|
(2) Press and hold the selected switch for 20 seconds. The garage door opener will enter registration mode. Text in Illustration
HINT: Before entering registration mode, the LED illuminates. After entering registration mode, the LED flashes at a cycle of 1 Hz (slowly). For a "rolling code" type system, after entering registration mode, the LED flashes at a cycle of 8.8 Hz (very rapidly) for 1.6 seconds, and then the LED flashes at a cycle of 1 Hz. |
|
|
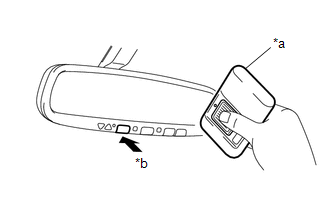
(3) After the garage door opener has entered registration mode, bring the original transmitter of the system to be registered within 1 to 3 inches of the garage door opener and press and hold one of the garage door opener switches. Then press the original transmitter switch. Text in Illustration
|
|
(4) If the transmitter code registration was successful, the LED of the garage door opener flashes at a cycle of 5.6 Hz (rapidly). If no malfunction occurs, release both the garage door opener switch and the original transmitter switch.
HINT:
- If transmitter code registration fails: 1) the original transmitter's battery may be low or need to be replaced, or 2) the system you are trying to register may not be compatible with the garage door opener.
- Some transmitter's signals stop after 1 to 2 seconds. For these types of transmitters: 1) press and hold one of the garage door opener switches, and 2) press and release (cycle) the transmitter switch every 2 seconds. Check if the transmitter code was successfully registered.
- After entering the garage door opener registration mode, transmitter code registration must be completed within 90 seconds. If 90 seconds elapse, the garage door opener will enter low power mode (refer to "Low Power Mode" below).

(b) Erase transmitter codes in the garage door opener clear mode.
HINT:
All 3 registered transmitter codes will be erased. No option exists for only erasing one transmitter code.
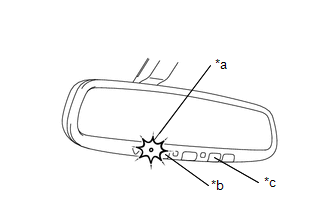
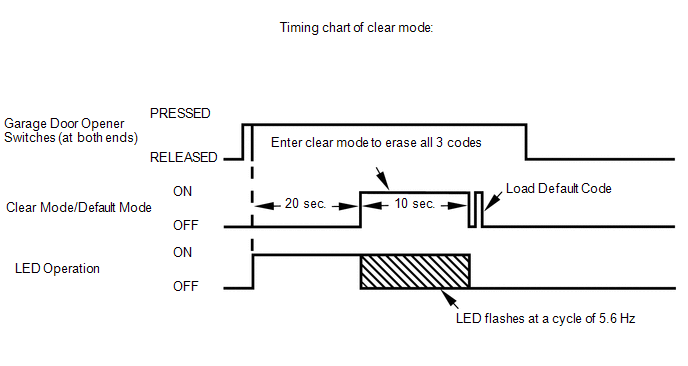
(1) Press and hold the left and right switches of the garage door opener for 20 seconds. The LED will begin to flash at a cycle of 5.6 Hz. Releasing the switches will end clear mode.
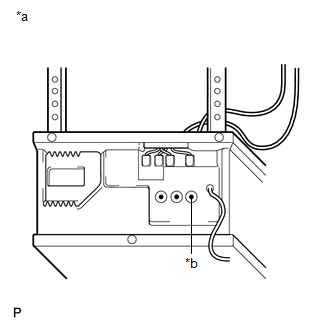
Text in Illustration|
*a |
LED |
|
*b |
Switch 1 |
|
*c |
Switch 3 |
HINT:
- If the switches are released within 10 seconds after the transmitter codes have been erased, the garage door opener will enter registration mode.
- If the switches are held for 10 seconds or more after the transmitter codes have been erased, default codes will be set to the switches of the garage door opener. Using these default codes, operation of the garage door opener can be checked using a tester.
(c) Low power mode:
(1) If a garage door opener switch is held for 100 seconds or more, the garage door opener will enter low power mode to economize on power consumption. When the garage door opener has entered low power mode, the LED turns off.
2. ROLLING CODE SYSTEMS
|
(a) If the handheld transmitter for the opener device (customer's garage door) being programmed uses a rolling code, it may be necessary to "train" the garage door opener device. Text in Illustration
HINT:
(1) Locate the training button on the opener device. (2) Press the training button. (3) Within 30 seconds, press and release the programmed garage door opener switch twice. Some opener devices may require the garage door opener switch to be pressed 3 times. HINT: The vehicle garage door opener system should now operate the opener device. Opener device refers to a device such as a ceiling mounted garage door opener, which is located at the customer's residence. It is necessary to read the instructions for the customer's opener device, to allow the above procedure to be performed safely and successfully. The customer should be aware that performing this procedure will result in a lowered level of security for the customer's opener device. |
|
 System Description
SYSTEM DESCRIPTION
1. DESCRIPTION
(a) A maximum of 3 kinds of transmitter code based systems (example: garage doors,
gates and entry gates) can be registered with the vehicle's garage door ope ...
 On-vehicle Inspection
ON-VEHICLE INSPECTION
PROCEDURE
1. INSPECT GARAGE DOOR OPENER
(a) Press each switch and check that the red LED turns on. If one or
more of the switches does not turn on the LED, conf ...
Other materials:
Speedometer Malfunction
DESCRIPTION
The meter CPU receives vehicle speed signals from the skid control ECU via the
CAN communication system (CAN V1 Bus). The speed sensor detects the wheel speed
and sends the appropriate signals to the skid control ECU. The skid control ECU
supplies power to the vehicle speed sensor ...
Diagnostic Trouble Code Chart
DIAGNOSTIC TROUBLE CODE CHART
TOUCH SELECT 2-4 AND HIGH-LOW SYSTEM
DTC Code
Detection Item
See page
P163B
4WD ECU Malfunction
P17A0
Automatic Disconnecting Differential Motor Control Circuit Open
...
Terminals Of Ecm
TERMINALS OF ECM
1. ECM
HINT:
The standard voltage between each pair of ECM terminals is shown in the table
below. In the table, first follow the information under "Condition". Look under
"Terminal No. (Symbol)" for the terminals to be inspected. The standard voltage
b ...
