Toyota Tacoma (2015-2018) Service Manual: Low Pitched Horn
Components
COMPONENTS
ILLUSTRATION
Inspection
INSPECTION
PROCEDURE
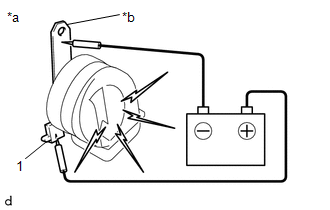
1. INSPECT LOW PITCHED HORN ASSEMBLY
(a) Check the operation.
|
(1) Apply battery voltage to the terminal 1 and body ground, and check that the low pitched horn assembly sounds. Text in Illustration
OK:
If the result is not as specified, replace the low pitched horn assembly. |
|
Installation
INSTALLATION
PROCEDURE
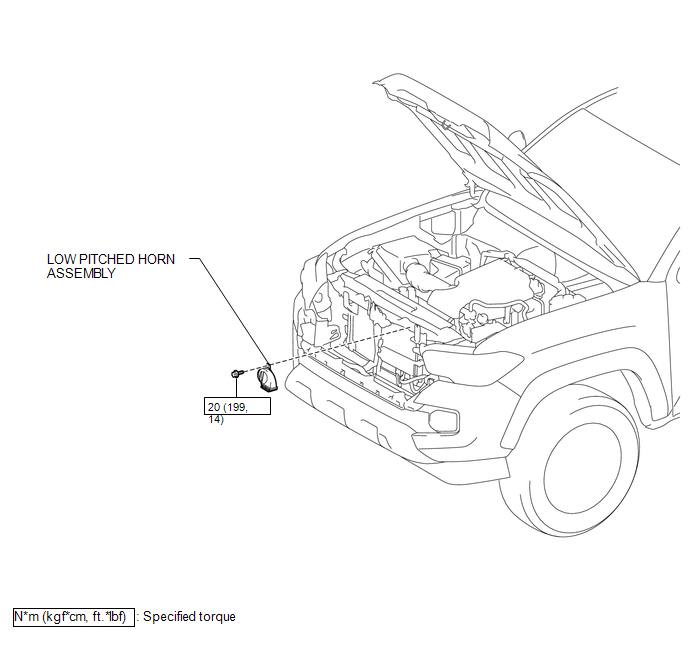
1. INSTALL LOW PITCHED HORN ASSEMBLY
(a) Install the low pitched horn assembly with the bolt.
Torque:
20 N·m {199 kgf·cm, 14 ft·lbf}
(b) Connect the connector.
2. INSTALL RADIATOR GRILLE
Click here .gif)
Removal
REMOVAL
PROCEDURE
1. REMOVE RADIATOR GRILLE
Click here .gif)
2. REMOVE LOW PITCHED HORN ASSEMBLY
|
(a) Disconnect the connector. |
|
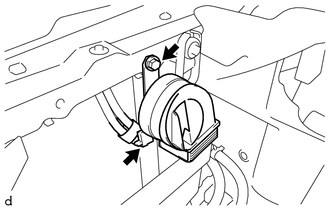
(b) Remove the bolt and low pitched horn assembly.
 Horn System
Parts Location
PARTS LOCATION
ILLUSTRATION
Precaution
PRECAUTION
1. IGNITION SWITCH EXPRESSIONS
(a) The type of ignition switch used on this model differs depending on the specifications
...
 Interior
...
Other materials:
Sound Signal Circuit between Radio Receiver and Stereo Jack Adapter
DESCRIPTION
The No. 1 stereo jack adapter assembly sends the sound signal from an external
device to the radio and display receiver assembly via this circuit.
If there is an open or short in the circuit, sound cannot be heard from the speakers
even if there is no malfunction in the radio and d ...
Problem Symptoms Table
PROBLEM SYMPTOMS TABLE
HINT:
Use the table below to help determine the cause of problem symptoms.
If multiple suspected areas are listed, the potential causes of the symptoms
are listed in order of probability in the "Suspected Area" column of the
table. Check each sy ...
Terminals Of Ecu
TERMINALS OF ECU
1. CHECK MAIN BODY ECU (MULTIPLEX NETWORK BODY ECU) AND DRIVER SIDE JUNCTION
BLOCK
(a) Disconnect the main body ECU (multiplex network body ECU) connectors.
Text in Illustration
*1
Main Body ECU (Multiplex Network Body ECU)
-
-
...
