Components
COMPONENTS
ILLUSTRATION
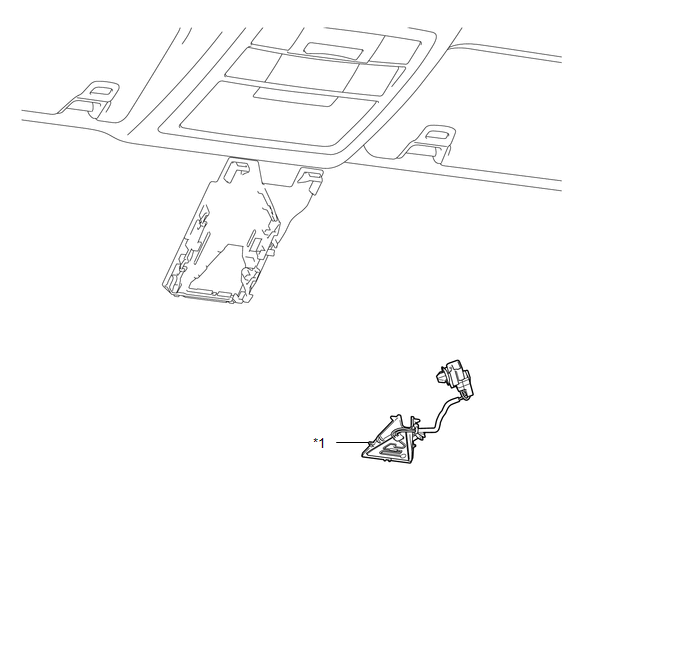
|
*1 |
FORWARD RECOGNITION WITH HEATER HOOD SUB-ASSEMBLY |
- |
- |
Removal
REMOVAL
PROCEDURE
1. REMOVE FORWARD RECOGNITION CAMERA
Click here .gif)
2. REMOVE FORWARD RECOGNITION WITH HEATER HOOD SUB-ASSEMBLY
NOTICE:
Do not touch the internal components of the forward recognition with heater hood sub-assembly or press on the heater when working on the forward recognition with heater hood sub-assembly.
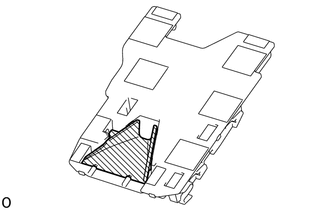
|
(a) Disconnect the connector. NOTICE: Do not pull the harness forcibly when disconnecting the connector. |
|
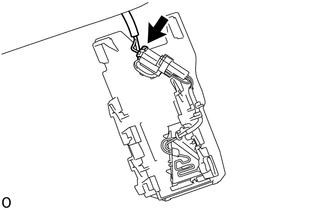
|
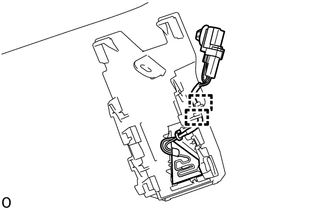
(b) Disengage the connector clamp. |
|
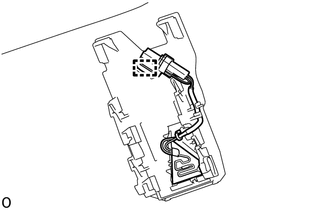
|
(c) Disengage the 2 guides to disconnect the wire harness. |
|
(d) Disengage the claw in the direction indicated by the arrow (1) in the illustration.
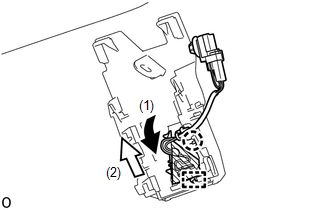
.png) |
Heater Area |
NOTICE:
Do not press the heater area.
(e) Disengage the guide in the direction indicated by the arrow (2) in the illustration to remove the forward recognition with heater hood sub-assembly.
Installation
INSTALLATION
PROCEDURE
1. INSTALL FORWARD RECOGNITION WITH HEATER HOOD SUB-ASSEMBLY
NOTICE:
Do not touch the internal components of the forward recognition with heater hood sub-assembly or press on the heater when working on the forward recognition with heater hood sub-assembly.
.png)
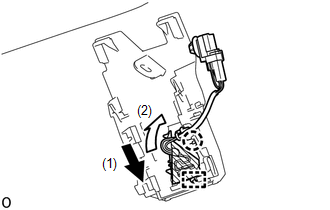
.png) |
Heater Area |
(a) Engage the guide in the direction indicated by the arrow (1) in the illustration.
(b) Engage the claw in the direction indicated by the arrow (2) in the illustration.
NOTICE:
Do not press the heater area.
|
(c) Engage the 2 guides to connect the wire harness to the forward recognition bracket. |
|
.png)
|
(d) Engage the connector clamp to install the forward recognition with heater hood sub-assembly. |
|
.png)
|
(e) Connect the connector. |
|
.png)
2. INSTALL FORWARD RECOGNITION CAMERA
Click here .gif)