COMPONENTS
ILLUSTRATION
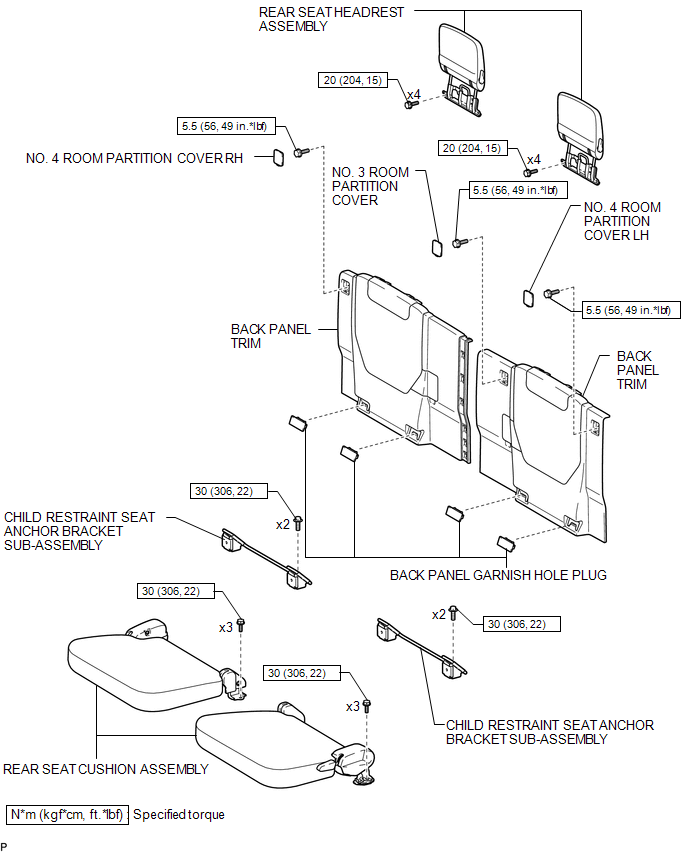
ILLUSTRATION
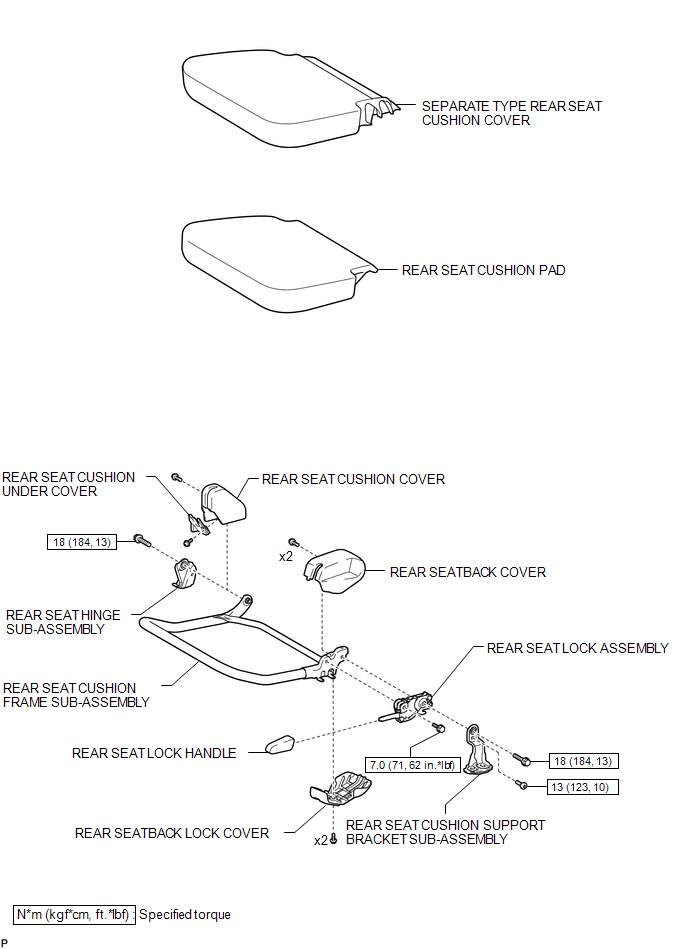
Related Tacoma materials
Cellular Phone Registration Failure, Phone Directory Transfer Failure
PROCEDURE
1.
CHECK OPERATION
(a) Place the cellular phone close to the navigation receiver assembly.
(b) Check if the cellular phone can be registered.
OK:
The cellular phone can be registered.
OK
...
Main Switch Circuit
DESCRIPTION
When the blind spot monitor main switch assembly (warning canceling switch assembly)
is turned on, a signal is sent to the blind spot monitor sensor LH. The blind spot
monitor system operates according to this signal.
WIRING DIAGRAM
CAUTION / NOTICE / HINT
NOTICE:
Inspect the ...
Inspection
INSPECTION
PROCEDURE
1. INSPECT BRAKE CYLINDER AND PISTON
(a) Check the cylinder bore and piston for rust and scoring.
2. INSPECT PAD LINING THICKNESS
(a) Using a ruler, measure the pad lining thickness.
Standard thickness:
11.5 mm (0.453 in.)
Minimum thickness:
1.0 mm ...