Toyota Tacoma (2015-2018) Service Manual: Disassembly
DISASSEMBLY
CAUTION / NOTICE / HINT
HINT:
- Use the same procedure for the RH side and LH side.
- The following procedure is for the LH side.
- When removing the No. 2 front wheel opening extension pad or No. 1 front wheel opening extension pad or front wheel opening extension pad, heat the front fender wheel opening moulding using a heat light.
- When removing the No. 3 body outside moulding pad or No. 2 body outside moulding pad or No. 1 body outside moulding pad, heat the quarter panel wheel opening moulding using a heat light.
|
Item |
Temperature |
|---|---|
|
Front Fender Wheel Opening Moulding or Quarter Panel Wheel Opening Moulding |
20 to 30°C (68 to 86°F) |
NOTICE:
Do not heat the front fender wheel opening moulding or quarter panel wheel opening moulding excessively.
PROCEDURE
1. REMOVE NO. 2 FRONT WHEEL OPENING EXTENSION PAD
(a) Using a heat light, heat the front fender wheel opening moulding.
|
(b) Remove the No. 2 front wheel opening extension pad. |
|
2. REMOVE NO. 1 FRONT WHEEL OPENING EXTENSION PAD
(a) Using a heat light, heat the front fender wheel opening moulding.
|
(b) Remove the No. 1 front wheel opening extension pad. |
|
3. REMOVE FRONT WHEEL OPENING EXTENSION PAD
(a) Using a heat light, heat the front fender wheel opening moulding.
|
(b) Remove the front wheel opening extension pad. |
|
4. REMOVE NO. 3 BODY OUTSIDE MOULDING PAD
(a) Using a heat light, heat the quarter panel wheel opening moulding.
|
(b) Remove the No. 3 body outside moulding pad. |
|
5. REMOVE NO. 2 BODY OUTSIDE MOULDING PAD
(a) Using a heat light, heat the quarter panel wheel opening moulding.
|
(b) Remove the No. 2 body outside moulding pad. |
|
6. REMOVE NO. 1 BODY OUTSIDE MOULDING PAD
(a) Using a heat light, heat the quarter panel wheel opening moulding.
|
(b) Remove the No. 1 body outside moulding pad. |
|
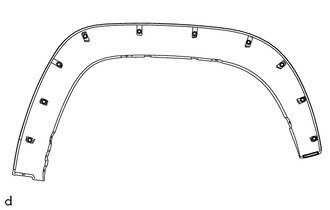
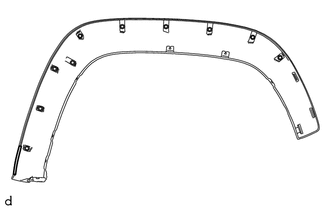
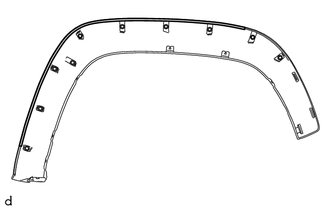
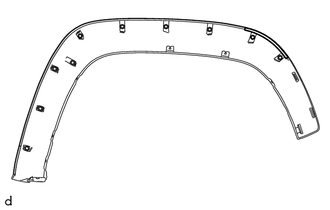
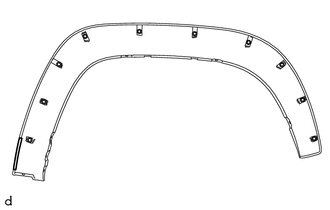
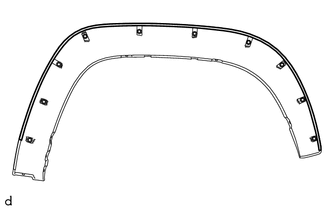
 Components
COMPONENTS
ILLUSTRATION
ILLUSTRATION
...
 Reassembly
REASSEMBLY
CAUTION / NOTICE / HINT
HINT:
Use the same procedure for the RH side and LH side.
The following procedure is for the LH side.
When installing a new front wheel opening ex ...
Other materials:
Diagnosis System
DIAGNOSIS SYSTEM
1. DESCRIPTION
(a) To check DTCs, connect the Techstream to the Data Link Connector 3 (DLC3)
of the vehicle. The Techstream displays DTCs and freeze frame data. The DTCs and
freeze frame data can be cleared with the Techstream (See page
).
2. NORMAL MODE AND CHECK MODE
(a) ...
Removal
REMOVAL
PROCEDURE
1. PRECAUTION
CAUTION:
Be sure to read Precaution thoroughly before servicing (See page
).
NOTICE:
After turning the ignition switch off, waiting time may be required before disconnecting
the cable from the negative (-) battery terminal. Therefore, make sure to read the
...
Child restraint systems
A child restraint system for a small child or baby must itself be properly
restrained on the seat with the lap portion of the lap/shoulder belt.
The laws of all 50 states of the U.S.A. and Canada now require the use of child
restraint systems.
Points to remember
Studies have shown that instal ...
