Toyota Tacoma (2015-2018) Service Manual: Transfer Oil
On-vehicle Inspection
ON-VEHICLE INSPECTION
PROCEDURE
1. CHECK TRANSFER OIL
|
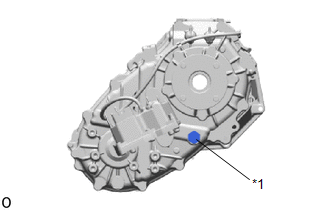
(a) Remove the filler plug and gasket. Text in Illustration
|
|
|
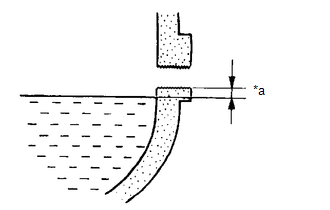
(b) Check that the oil level is between 0 to 5.0 mm (0 to 0.196 in.) from the bottom lip of the filler plug hole. Text in Illustration
If the result is not as specified, add transfer oil. Oil grade: Toyota Genuine Transfer Gear Oil LF or Equivalent Viscosity: SAE 75W NOTICE: Too much or too little oil will lead to transfer problems. |
|
(c) When the oil level is too low, check for oil leakage.
(d) Install a new gasket to the filler plug, and then install the filler plug.
Torque:
37 N·m {377 kgf·cm, 27 ft·lbf}
Replacement
REPLACEMENT
PROCEDURE
1. DRAIN TRANSFER OIL
NOTICE:
Before proceeding with work, wedge a cloth or similar item into the transfer case lower protector to prevent transfer oil from sticking to the transfer case protector cushion.
|
(a) Remove the filler plug and gasket. Text in Illustration
|
|
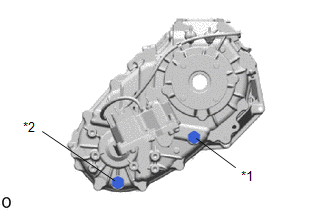
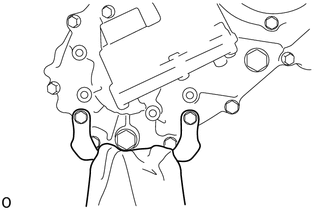
(b) Remove the drain plug and gasket to drain the transfer oil.
(c) Install a new gasket to the drain plug, and then install the drain plug.
Torque:
37 N·m {377 kgf·cm, 27 ft·lbf}
2. ADD TRANSFER OIL
|
(a) Add oil so that the oil level is between 0 to 5.0 mm (0 to 0.196 in.) from the bottom lip of the filler plug hole. Text in Illustration
Oil grade: Toyota Genuine Transfer Gear Oil LF or Equivalent Viscosity: SAE 75W Standard capacity: 1.0 liters (1.1 US qts, 0.9 Imp. qts) NOTICE: Too much or too little oil will lead to transfer problems. |
|
.png)
(b) Install a new gasket to the filler plug, and then install the filler plug.
Torque:
37 N·m {377 kgf·cm, 27 ft·lbf}
NOTICE:
- When adding transfer oil, make sure the vehicle is level.
- An excessively large or small amount of oil may cause problems.
- After adding oil, drive the vehicle and recheck the oil level.
(c) Inspect for transfer oil leaks.
 Transfer Case Rear Oil Seal
Components
COMPONENTS
ILLUSTRATION
Replacement
REPLACEMENT
PROCEDURE
1. DRAIN TRANSFER OIL
2. REMOVE PROPELLER WITH CENTER BEARING SHAFT ASSEMBLY
(See page )
3. REMOVE OUTPUT SHAFT ...
 Transfer System
Precaution
PRECAUTION
Before disassembly, clean the transfer assembly and remove any deposited
sand and mud to prevent it from entering the transfer during disassembly
and assembly. ...
Other materials:
Precaution
PRECAUTION
PRECAUTION FOR DISCONNECTING CABLE FROM NEGATIVE BATTERY TERMINAL
NOTICE:
When disconnecting the cable from the negative (-) battery terminal, initialize
the following systems after the cable is reconnected.
Click here
IGNITION SWITCH EXPRESSIONS
(a) The type of ignition switch ...
Data List / Active Test
DATA LIST / ACTIVE TEST
1. DATA LIST
NOTICE:
In the table below, the values listed under "Normal Condition" are reference
values. Do not depend solely on these reference values when deciding whether a part
is faulty or not.
HINT:
Using the Techstream to read the Data List allows t ...
Dtc Check / Clear
DTC CHECK / CLEAR
1. DTC CHECK/CLEAR (When Using Techstream)
(a) Check the DTC.
(1) Turn the ignition switch off.
(2) Connect the Techstream to the DLC3.
(3) Turn the ignition switch to ON.
(4) Turn the Techstream on.
(5) Read the DTCs following the prompts on the Techstream screen. Enter the ...
