Components
COMPONENTS
ILLUSTRATION
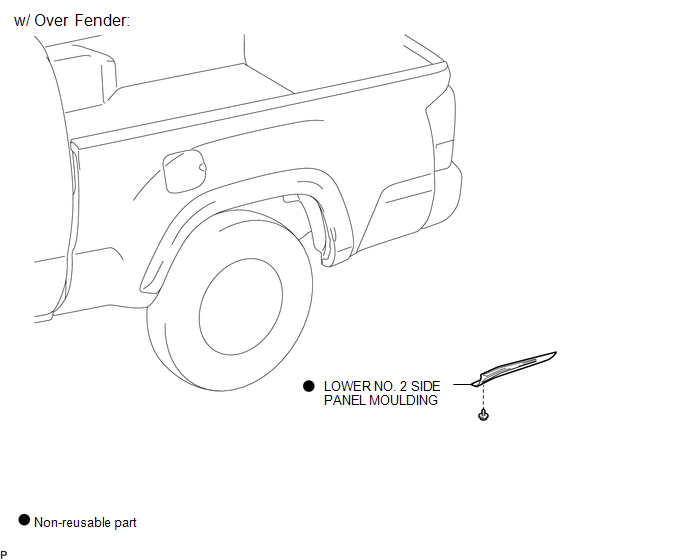
ILLUSTRATION
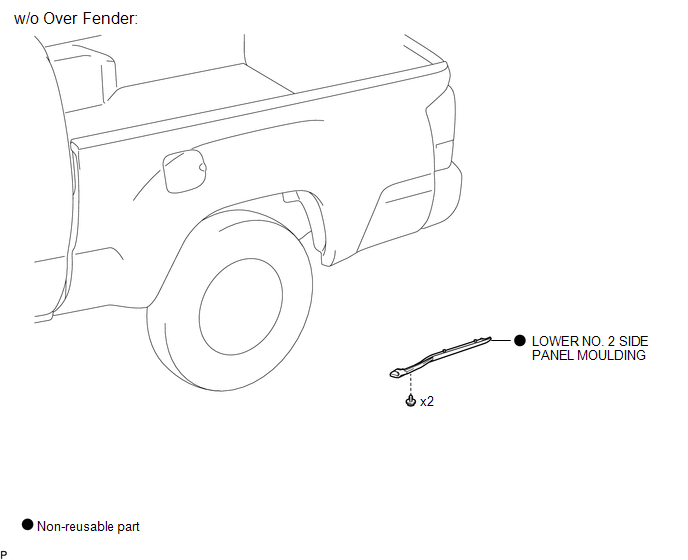
Removal
REMOVAL
CAUTION / NOTICE / HINT
HINT:
- Use the same procedure for the RH side and LH side.
- The following procedure is for the LH side.
- When removing the lower No. 2 side panel moulding, heat the vehicle body and lower No. 2 side panel moulding using a heat light.
|
Item |
Temperature |
|---|---|
|
Vehicle Body |
40 to 60°C (104 to 140°F) |
|
Lower No. 2 Side Panel Moulding |
20 to 30°C (68 to 86°F) |
NOTICE:
Do not heat the vehicle body or lower No. 2 side panel moulding excessively.
PROCEDURE
1. REMOVE LOWER NO. 2 SIDE PANEL MOULDING (w/ Over Fender)
(a) Using a heat light, heat the lower No. 2 side panel moulding.
|
(b) Remove the screw. Text in Illustration
|
|
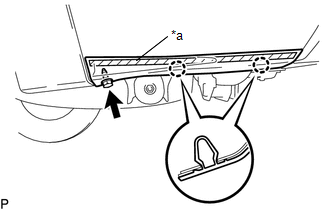
(c) Disengage the 2 claws, and peel off the double-sided tape to remove the lower No. 2 side panel moulding.
2. REMOVE LOWER NO. 2 SIDE PANEL MOULDING (w/o Over Fender)
(a) Using a heat light, heat the lower No. 2 side panel moulding.
|
(b) Remove the 2 screws. Text in Illustration
|
|
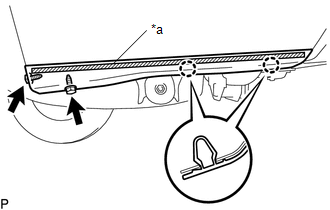
(c) Disengage the 2 claws, and peel off the double-sided tape to remove the lower No. 2 side panel moulding.
Installation
INSTALLATION
CAUTION / NOTICE / HINT
HINT:
- Use the same procedure for the RH side and LH side.
- The following procedure is for the LH side.
- When installing the lower No. 2 side panel moulding, heat the vehicle body and lower No. 2 side panel moulding using a heat light.
PROCEDURE
1. INSTALL LOWER NO. 2 SIDE PANEL MOULDING (w/ Over Fender)
(a) Clean the vehicle body surface.
(1) Using a heat light, heat the vehicle body surface.
(2) Remove the double-sided tape from the vehicle body.
(3) Clean off any tape adhesive residue with cleaner.
(b) Install a new lower No. 2 side panel moulding.
(1) Using a heat light, heat the vehicle body and a new lower No. 2 side panel moulding.
(2) Remove the release paper from the lower No. 2 side panel moulding.
HINT:
After removing the release paper, keep the exposed adhesive free from foreign matter.
|
(3) Engage the claws to install the lower No. 2 side panel moulding. Text in Illustration
|
|
.png)
(4) Install the screw.
2. INSTALL LOWER NO. 2 SIDE PANEL MOULDING (w/o Over Fender)
(a) Clean the vehicle body surface.
(1) Using a heat light, heat the vehicle body surface.
(2) Remove the double-sided tape from the vehicle body.
(3) Clean off any tape adhesive residue with cleaner.
(b) Install a new lower No. 2 side panel moulding.
(1) Using a heat light, heat the vehicle body and a new lower No. 2 side panel moulding.
(2) Remove the release paper from the lower No. 2 side panel moulding.
HINT:
After removing the release paper, keep the exposed adhesive free from foreign matter.
|
(3) Engage the claws to install the lower No. 2 side panel moulding. Text in Illustration
|
|
.png)
(4) Install the 2 screws.