Components
COMPONENTS
ILLUSTRATION
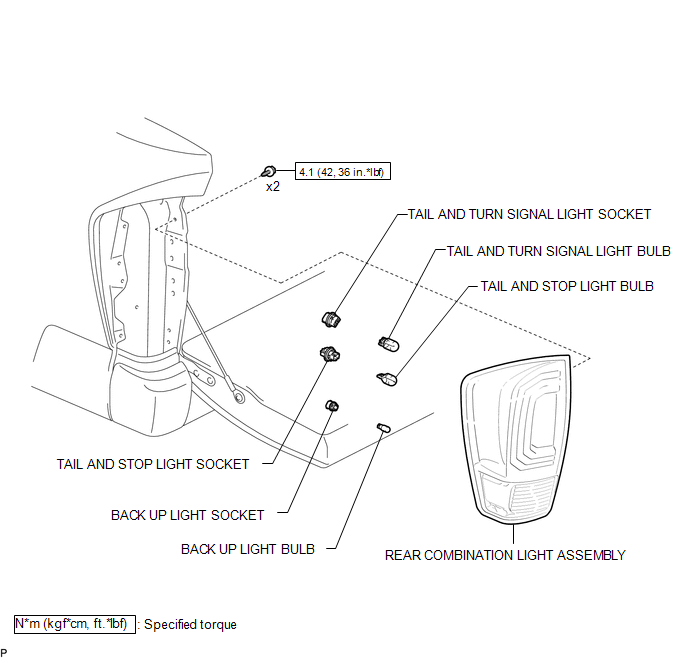
Disassembly
DISASSEMBLY
CAUTION / NOTICE / HINT
HINT:
- Use the same procedure for both the LH and RH sides.
- The procedure described below is for the LH side.
PROCEDURE
1. REMOVE TAIL AND TURN SIGNAL LIGHT BULB
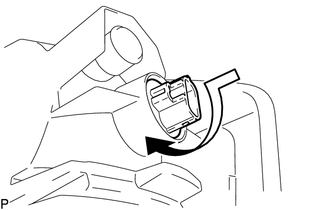
|
(a) Turn the tail and turn signal light socket with the tail and turn signal light bulb in the direction indicated by the arrow shown in the illustration to remove them. |
|
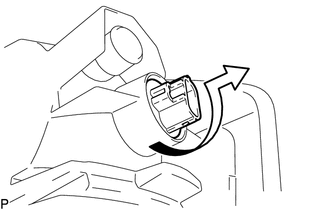
(b) Remove the tail and turn signal light bulb from the tail and turn signal light socket.
2. REMOVE TAIL AND STOP LIGHT BULB
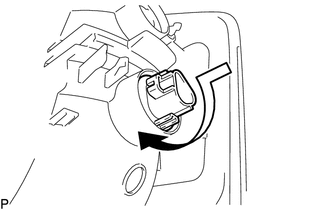
|
(a) Turn the tail and stop light socket with the tail and stop light bulb in the direction indicated by the arrow shown in the illustration to remove them. |
|
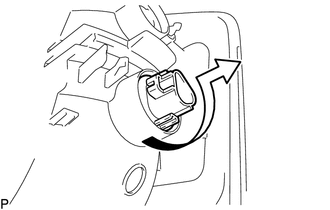
(b) Remove the tail and stop light bulb from the tail and stop light socket.
3. REMOVE BACK UP LIGHT BULB
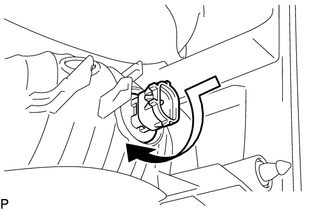
|
(a) Turn the back up light socket with the back up light bulb in the direction indicated by the arrow shown in the illustration to remove them. |
|
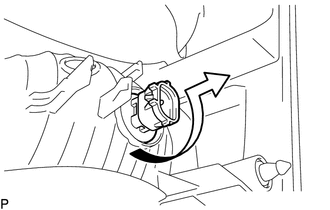
(b) Remove the back up light bulb from the back up light socket.
Reassembly
REASSEMBLY
CAUTION / NOTICE / HINT
HINT:
- Use the same procedure for both the LH and RH sides.
- The procedure described below is for the LH side.
PROCEDURE
1. INSTALL BACK UP LIGHT BULB
(a) Install the back up light bulb to the back up light socket.
|
(b) Turn the back up light socket with back up light bulb in the direction indicated by the arrow shown in the illustration to install them. |
|
2. INSTALL TAIL AND STOP LIGHT BULB
(a) Install the tail and stop light bulb to the tail and stop light socket.
|
(b) Turn the tail and stop light socket with tail and stop light bulb in the direction indicated by the arrow shown in the illustration to install them. |
|
3. INSTALL TAIL AND TURN SIGNAL LIGHT BULB
(a) Install the tail and turn signal light bulb to the tail and turn signal light socket.
|
(b) Turn the tail and turn signal light socket with tail and turn signal light bulb in the direction indicated by the arrow shown in the illustration to install them. |
|
Removal
REMOVAL
CAUTION / NOTICE / HINT
HINT:
- Use the same procedure for both the LH and RH sides.
- The procedure described below is for the LH side.
PROCEDURE
1. REMOVE REAR COMBINATION LIGHT ASSEMBLY
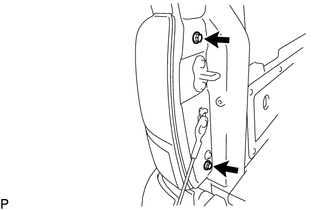
|
(a) Remove the 2 bolts. |
|
|
(b) Disengage the 2 pins to separate the rear combination light assembly. |
|
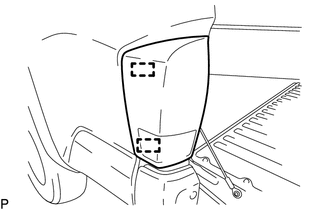
|
(c) Disengage the 2 guides to separate the wire harness. |
|
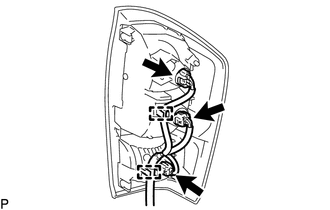
(d) Disconnect the 3 connectors to remove the rear combination light assembly.
Installation
INSTALLATION
CAUTION / NOTICE / HINT
HINT:
- Use the same procedure for both the LH and RH sides.
- The procedure described below is for the LH side.
PROCEDURE
1. INSTALL REAR COMBINATION LIGHT ASSEMBLY
(a) Connect the 3 connectors.
(b) Engage the 2 guides to install the wire harness.
(c) Engage the 2 pins to install the rear combination light assembly.
(d) Install the 2 bolts.
Torque:
4.1 N·m {42 kgf·cm, 36 in·lbf}