Components
COMPONENTS
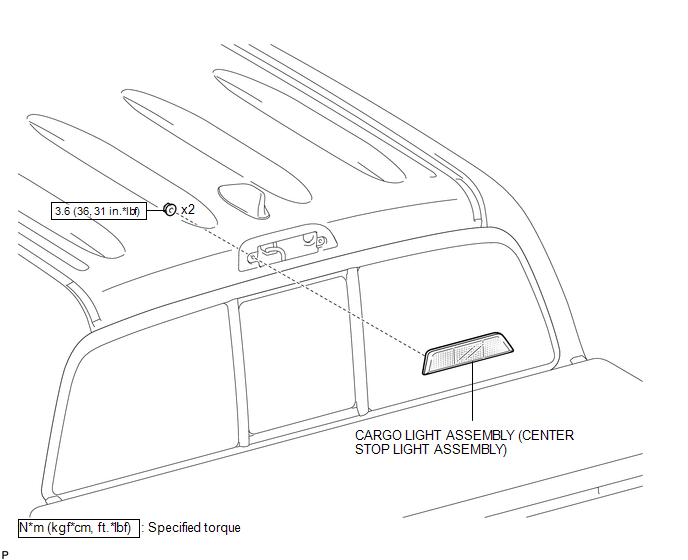
ILLUSTRATION
Removal
REMOVAL
PROCEDURE
1. REMOVE ROOF HEADLINING ASSEMBLY
- for Double Cab:
(See page
.gif) )
) - for Access Cab:
(See page
)
2. REMOVE CARGO LIGHT ASSEMBLY (CENTER STOP LIGHT ASSEMBLY)
|
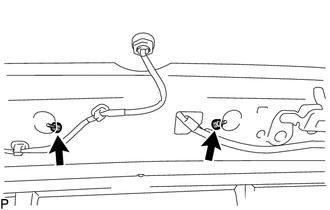
(a) Remove the 2 nuts. |
|
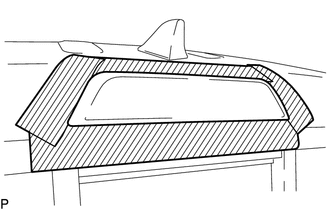
(b) Apply protective tape around the cargo light assembly (center stop light assembly).
 Text in Illustration
.png) |
Protective Tape |
|
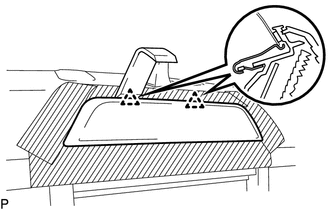
(c) Using a moulding remover D, disengage the 2 clips to separate the cargo light assembly (center stop light assembly). |
|
|
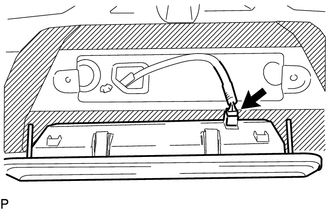
(d) Disconnect the connector to remove the cargo light assembly (center stop light assembly). |
|
Inspection
INSPECTION
PROCEDURE
1. INSPECT CARGO LIGHT ASSEMBLY (CENTER STOP LIGHT ASSEMBLY)
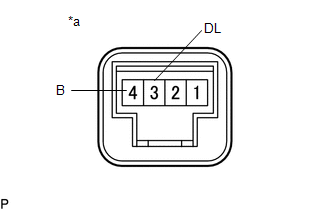
(a) Check the illuminates.
|
(1) Apply battery voltage to the connector and check the light illumination condition. Text in Illustration
OK:
If the result is not as specified, replace the cargo light assembly (center stop light assembly). |
|
Installation
INSTALLATION
PROCEDURE
1. INSTALL CARGO LIGHT ASSEMBLY (CENTER STOP LIGHT ASSEMBLY)
(a) Connect the connector.
|
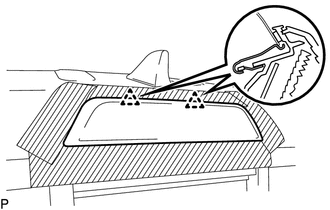
(b) Engage the 2 clips to install the cargo light assembly (center stop light assembly). |
|
(c) Install the 2 nuts.
Torque:
3.6 N·m {36 kgf·cm, 31 in·lbf}
(d) Remove the protective tape.
2. INSPECT ROOF HEADLINING ASSEMBLY
- for Double Cab:
(See page
.gif) )
) - for Access Cab:
(See page
)