Toyota Tacoma (2015-2018) Service Manual: Traction Off Switch
Components
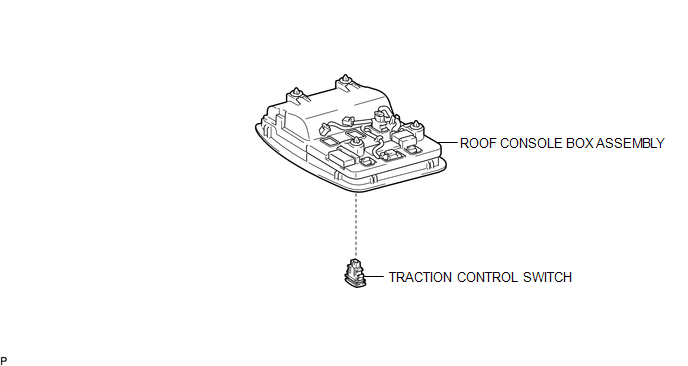
COMPONENTS
ILLUSTRATION
Removal
REMOVAL
PROCEDURE
1. REMOVE ROOF CONSOLE BOX ASSEMBLY
(See page .gif) )
)
2. REMOVE A-TRAC SWITCH (TRACTION CONTROL SWITCH)
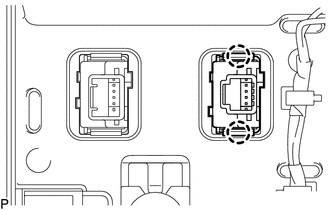
(a) Disconnect the A-TRAC switch (traction control switch) connector.
|
(b) Using a screwdriver, detach the 2 claws and remove the A-TRAC switch (traction control switch) from the roof console box assembly. |
|
Inspection
INSPECTION
PROCEDURE
1. INSPECT A-TRAC SWITCH (TRACTION CONTROL SWITCH)
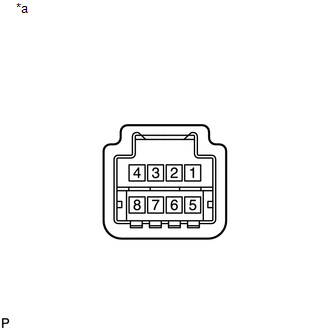
(a) Check the resistance.
|
(1) Measure the resistance according to the value(s) in the table below. Text in Illustration
Standard Resistance:
If the value is not as specified, replace the A-TRAC switch (traction control switch). |
|
Installation
INSTALLATION
PROCEDURE
1. INSTALL A-TRAC SWITCH (TRACTION CONTROL SWITCH)
(a) Attach the 2 claws to install the A-TRAC switch (traction control switch) into the roof console box assembly.
(b) Connect the A-TRAC switch (traction control switch) connector.
2. INSTALL ROOF CONSOLE BOX ASSEMBLY
(See page .gif) )
)
 Removal
REMOVAL
PROCEDURE
1. REMOVE STEERING PAD
(See page )
2. REMOVE STEERING WHEEL ASSEMBLY
3. REMOVE LOWER STEERING COLUMN COVER
4. REMOVE UPPER STEERING COLUMN COVER
5. REMOVE SPIRAL ...

Other materials:
Data List / Active Test
DATA LIST / ACTIVE TEST
NOTICE:
In the table below, the values listed under "Normal Condition" are reference
values. Do not depend solely on these reference values when deciding whether a part
is faulty or not.
HINT:
Using the Techstream to read the Data List allows the values or s ...
How To Proceed With Troubleshooting
HOW TO PROCEED WITH TROUBLESHOOTING
1. OPERATION FLOW
HINT:
Perform troubleshooting in accordance with the procedures below. The following
is an outline of basic troubleshooting procedures. Confirm the troubleshooting procedures
for the circuit you are working on before beginning troubleshoot ...
Components
COMPONENTS
ILLUSTRATION
ILLUSTRATION
ILLUSTRATION
ILLUSTRATION
...
