Toyota Tacoma (2015-2018) Service Manual: Removal
REMOVAL
CAUTION / NOTICE / HINT
HINT:
- Use the same procedure for the RH and LH sides.
- The procedure described below is for the LH side.
PROCEDURE
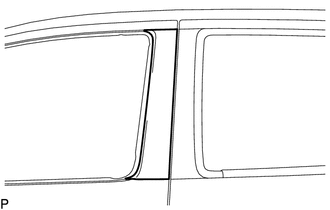
1. REMOVE FRONT DOOR GLASS RUN
.gif)
2. REMOVE FRONT DOOR GLASS OUTER WEATHERSTRIP ASSEMBLY
(See page
)
3. REMOVE NO. 1 BLACK OUT TAPE
(a) Using a heat light, heat the vehicle body and No. 1 black out tape.
Heating Temperature|
Item |
Temperature |
|---|---|
|
Vehicle Body and No. 1 Black Out Tape |
40 to 60°C (104 to 140°F) |
NOTICE:
Do not heat the vehicle body or No. 1 black out tape excessively.
|
(b) Pull back on one of the ends of the No. 1 black out tape to remove it. HINT: When pulling on the No. 1 black out tape, pull it parallel to the body. |
|
 Installation
INSTALLATION
CAUTION / NOTICE / HINT
HINT:
Use the same procedure for the RH and LH sides.
The procedure described below is for the LH side.
PROCEDURE
1. REPAIR INSTRUCTION
(a) ...
 Name Plate
...
Other materials:
On-vehicle Inspection
ON-VEHICLE INSPECTION
PROCEDURE
1. INSPECT LOWER NO. 2 INSTRUMENT PANEL AIRBAG ASSEMBLY (for Vehicle not Involved
in Collision)
(a) Perform a diagnostic system check (See page
).
(b) With the lower No. 2 instrument panel airbag assembly ...
CD cannot be Inserted / Played or CD is Ejected Right After Insertion
PROCEDURE
1.
CHECK IF A PROPER CD IS INSERTED
(a) Make sure that the CD is an audio CD or a CD with an MP3, WMA or AAC file,
and that it is not deformed, flawed, stained, deteriorated or otherwise defective.
OK:
CD is normal.
HINT:
Translucent or uniq ...
System Description
SYSTEM DESCRIPTION
1. ILLUMINATED ENTRY SYSTEM
(a) The illuminated entry system has the following control functions:
Control
Outline
Lights that Operate
Actuation Area-linked*1
When a registered key enters any actuation area around the ...
