Components
COMPONENTS
ILLUSTRATION
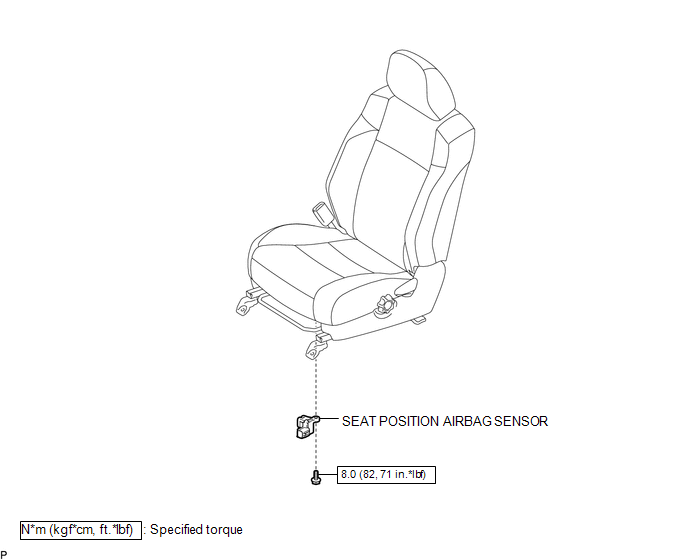
On-vehicle Inspection
ON-VEHICLE INSPECTION
PROCEDURE
1. INSPECT SEAT POSITION AIRBAG SENSOR (for Vehicle not Involved in Collision)
(a) Perform a diagnostic system check (See page
.gif) ).
).
2. INSPECT SEAT POSITION AIRBAG SENSOR (for Vehicle Involved in Collision)
(a) Perform a diagnostic system check (See page
).
(b) Even if the airbag was not deployed, perform a visual check for damage to the seat position airbag sensor. If there are any defects as mentioned below, replace the seat position airbag sensor with a new one:
- Cracks, dents or chips in the case.
- Cracks or other damage to the connector.
CAUTION:
For removal and installation procedures of the seat position sensor, see pages
and
, and be sure to follow the correct procedure.
Installation
INSTALLATION
PROCEDURE
1. INSTALL SEAT POSITION AIRBAG SENSOR
(a) Check that the ignition switch is OFF.
(b) Check that the cable is disconnected from the battery negative (-) terminal.
CAUTION:
After disconnecting the cable from the terminal, wait for at least 90 seconds before starting the operation.
NOTICE:
- Installation of the connector is done with the sensor assembly installed. Make sure the sensor assembly is installed to the specified torque.
- If the sensor assembly has been dropped, or there are cracks, dents or other defects in the case, bracket or connector, replace the sensor assembly with a new one.
- When installing the sensor assembly, make sure that the SRS wiring does not interfere with any other parts and is not pinched between other parts.
- After installation, shake the sensor assembly to check that it is not loose.
(c) Using a T30 "TORX" socket wrench, install the seat position airbag sensor with the screw.
Torque:
8.0 N·m {82 kgf·cm, 71 in·lbf}
(d) Make sure that the clearance between the seat position sensor and the seat rail is within 0.6 mm (0.023 in.) and 2 mm (0.079 in.).
(e) Check that there is no slack in the installation parts of the seat position sensor.
(f) Connect the connector to the seat position sensor.
2. INSTALL FRONT SEAT ASSEMBLY LH
.gif)
3. CONNECT CABLE TO NEGATIVE BATTERY TERMINAL
Torque:
5.4 N·m {55 kgf·cm, 48 in·lbf}
NOTICE:
When disconnecting the cable, some systems need to be initialized after the cable is reconnected.
Click here
4. INSPECT SRS WARNING LIGHT
Click here
Removal
REMOVAL
PROCEDURE
1. PRECAUTION
CAUTION:
Be sure to read Precaution thoroughly before servicing (See page
.gif) ).
).
NOTICE:
After turning the ignition switch off, waiting time may be required before disconnecting the cable from the negative (-) battery terminal. Therefore, make sure to read the disconnecting the cable from the negative (-) battery terminal notices before proceeding with work.
Click here
2. DISCONNECT CABLE FROM NEGATIVE BATTERY TERMINAL
CAUTION:
Wait at least 90 seconds after disconnecting the cable from the negative (-) battery terminal to disable the SRS system.
NOTICE:
When disconnecting the cable, some systems need to be initialized after the cable is reconnected.
Click here
3. REMOVE FRONT SEAT ASSEMBLY LH
Click here
4. REMOVE SEAT POSITION AIRBAG SENSOR
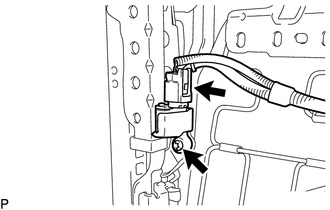
(a) Disconnect the connector from the seat position airbag sensor.
(b) Using a T30 "TORX" socket wrench, remove the screw and seat position airbag sensor.