REMOVAL
CAUTION / NOTICE / HINT
HINT:
PROCEDURE
1. REMOVE FRONT DOOR GLASS RUN
2. REMOVE FRONT DOOR GLASS OUTER WEATHERSTRIP ASSEMBLY
(See page
)
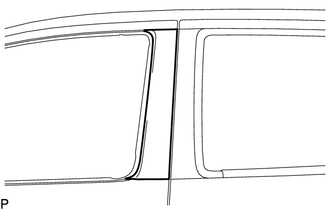
3. REMOVE NO. 1 BLACK OUT TAPE
(a) Using a heat light, heat the vehicle body and No. 1 black out tape.
Heating Temperature|
Item |
Temperature |
|---|---|
|
Vehicle Body and No. 1 Black Out Tape |
40 to 60°C (104 to 140°F) |
NOTICE:
Do not heat the vehicle body or No. 1 black out tape excessively.
|
(b) Pull back on one of the ends of the No. 1 black out tape to remove it. HINT: When pulling on the No. 1 black out tape, pull it parallel to the body. |
|
Installation
Name PlateRemoval
REMOVAL
PROCEDURE
1. REMOVE AIR CONDITIONING CONTROL ASSEMBLY (for Automatic Air Conditioning System)
Click here
2. REMOVE AIR CONDITIONING CONTROL ASSEMBLY (for Manual Air Conditioning System)
Click here
3. REMOVE LOWER NO. 2 INSTRUMENT PANEL AIRBAG ASSEMBLY
Click here
4. REMOVE INSTR ...
Front Airbag Sensor RH Circuit Malfunction (B1610/13)
DESCRIPTION
The front airbag sensor RH consists of parts such as the diagnostic circuit and
the frontal detection sensor.
When the airbag sensor assembly receives signals from the frontal deceleration
sensor, it determines whether or not the SRS should be activated.
DTC B1610/13 is set when a ...
Removal
REMOVAL
PROCEDURE
1. REMOVE FRONT CONSOLE BOX
(See page )
2. DISCONNECT TRANSMISSION CONTROL CABLE ASSEMBLY
3. REMOVE TRANSMISSION CONTROL CABLE ASSEMBLY
(a) Remove the nut and clip and disconnect the transmission control cable
assembly from the automatic transmission assem ...